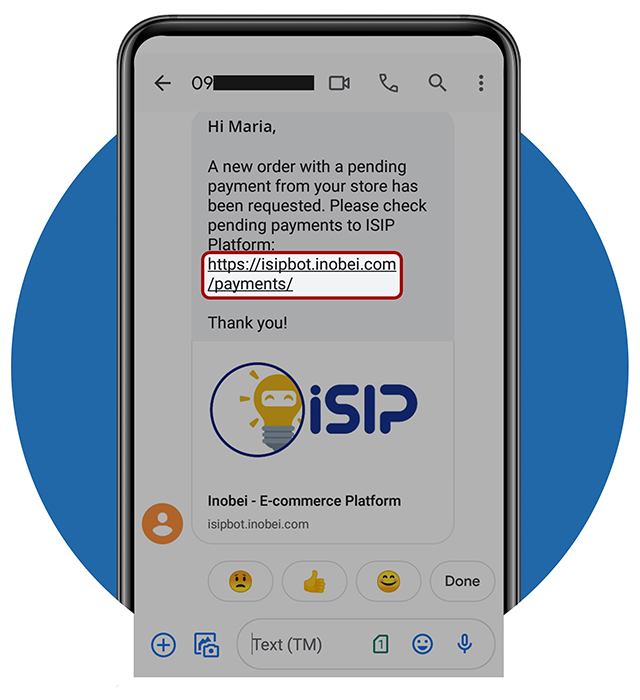
STEP 1 - Payment Notification - Via SMS
- You will receive a Notification via SMS and Email after your customer has paid and sent a reference number in Facebook Messenger
- For SMS Notification, you will receive a link to check and verify their payment.
- click the https://isipbot.inobei.com/payments
- This will redirect you to your ISIP sign-in page
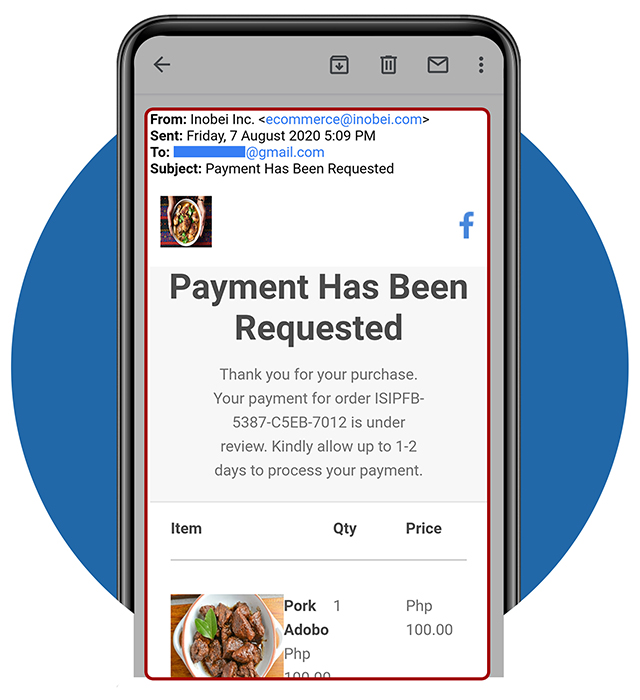
STEP 1 - Payment Notification - Via Email
- You will receive an Email Notification from ecommerce@inobei.com which includes order number, processing days and order details of your customer.
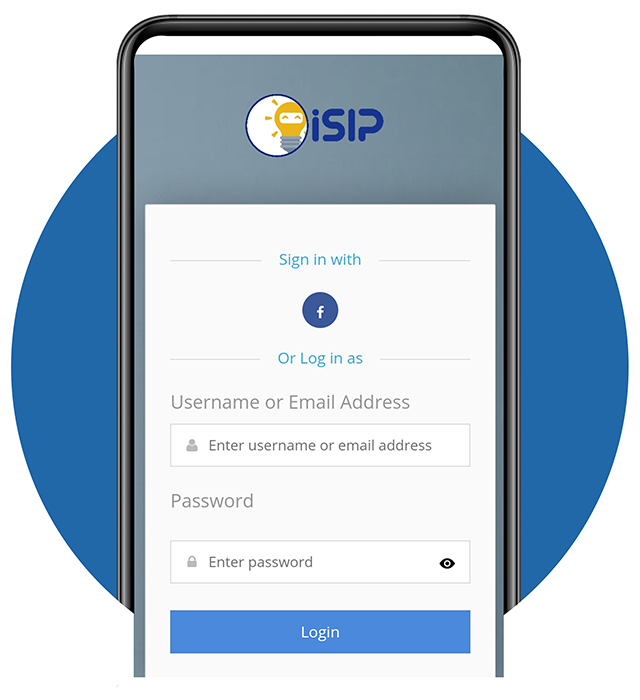
STEP 2 - Sign in Your ISIP Account
- Here is the sign-in page of ISIP
- Tap the Facebook Logo to automatically sign in with your ISIP Account.
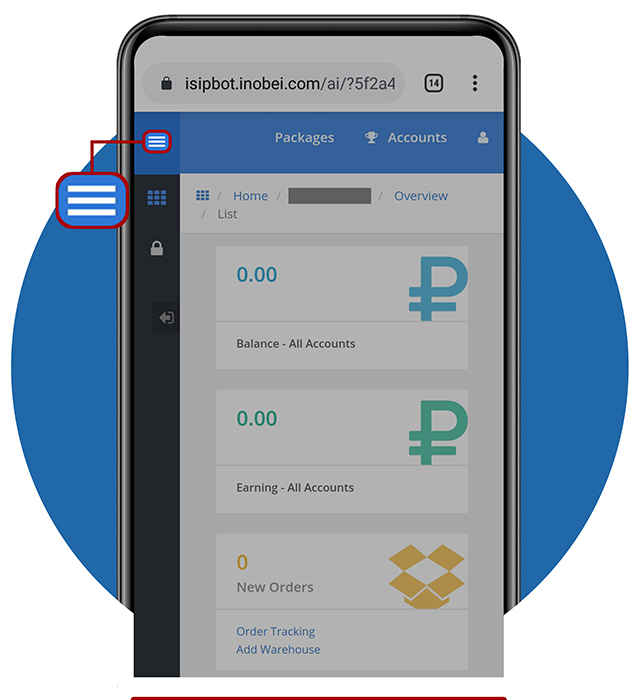
STEP 3 - ISIP Account
- You are now signed in with ISIP
- Here, you can see your account
- Tap the 3 lines-button to view menus
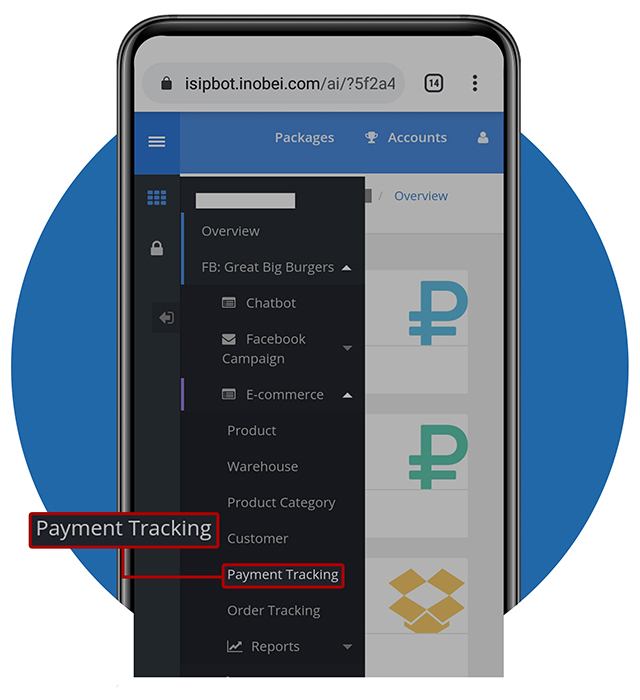
STEP 4 - Selecting Payment Tracking
- A preview of menu will appear
- Tap Payment Tracking to view all pending payments
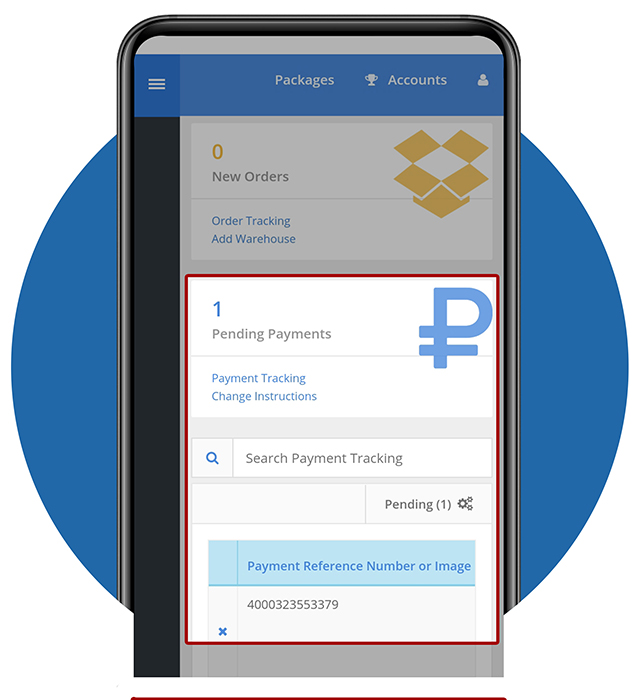
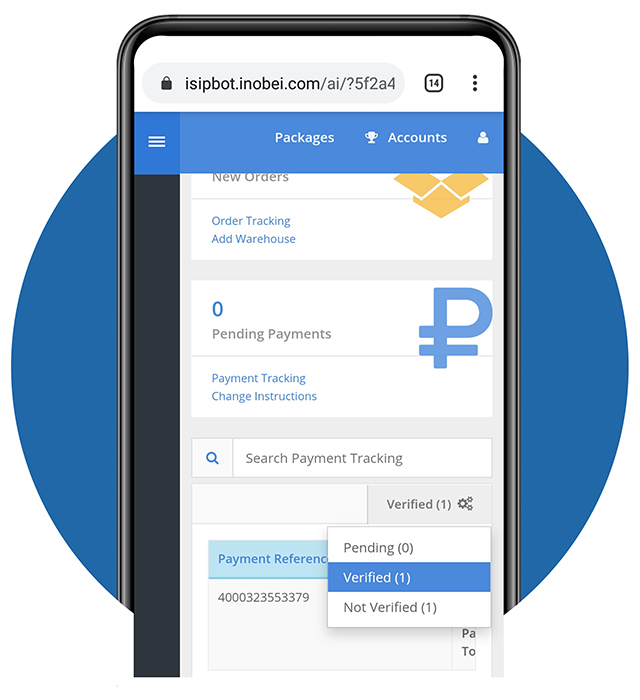
STEP 5 - Verifying Payment – Part 1
- All Payments status are viewed here:
- Pending
- Verified
- Not Verified
- A reference number or image will be viewed here. This is what our customers have sent in our Facebook Messenger.
- Swipe to the left to left to view all details
- All Payments status are viewed here:
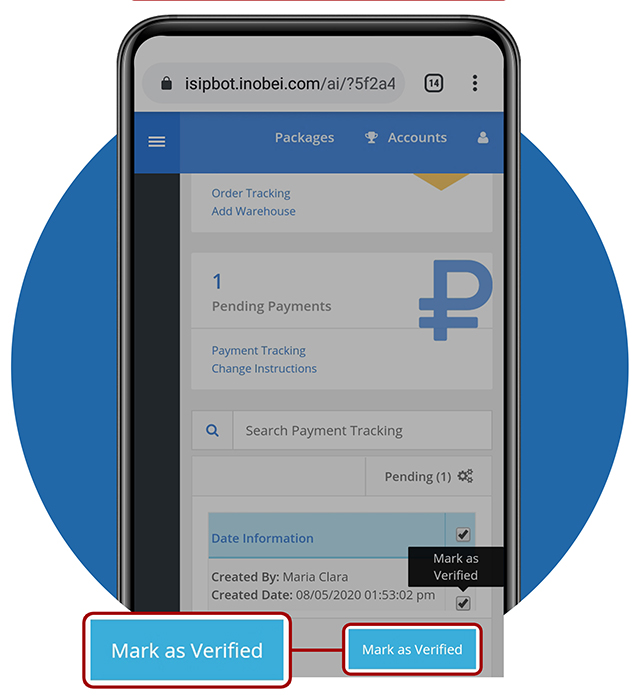
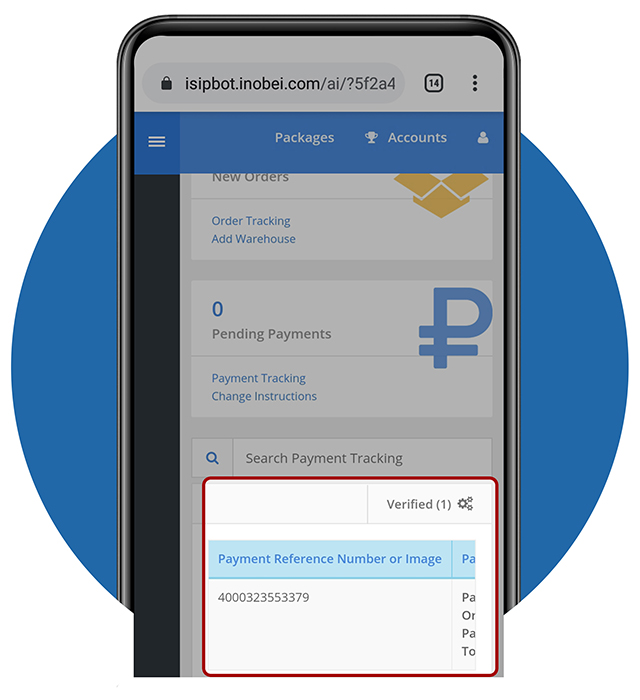
STEP 5 - Verifying Payment – Part 2
- The order details: who and when the orders was created will be viewed here.
- Tick mark the check box then tap the Mark as Verified button to verify payment.
- Marking this verified indicates that a merchant already received the payment.
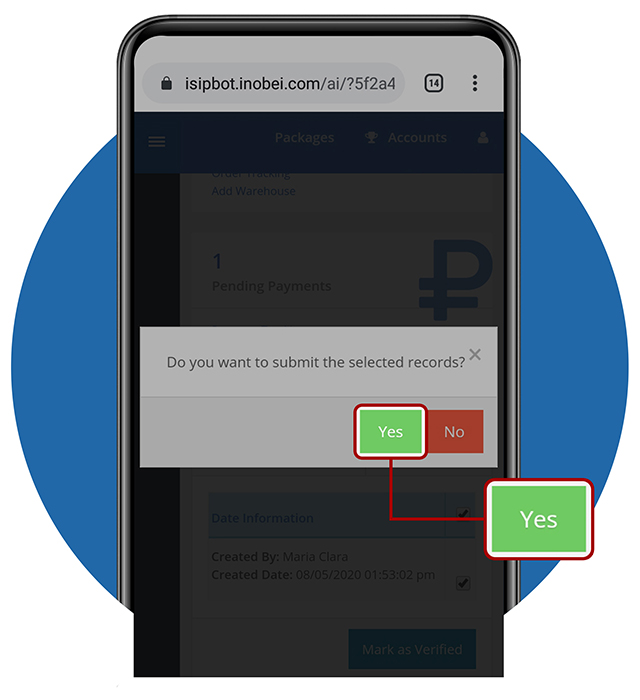
STEP 5 - Verifying Payment – Part 3
- A pop-up confirmation message will appear
- To proceed, tap “Yes” button
- This is a confirmation if you want to submit what you have marked as verified.
STEP 6 - Verified Payments – Part 1
- You can see the verified payments in the Verified Tab
- Select Verified in the drop down menu
STEP 6 - Verified Payments – Part 2
- After selecting Verified, you will see all the payments that you had verified.