After verifying a customer’s payment, we will now go to Order Tracking. Here is a Step-by-Step Guide on how to track and process customer’s order:
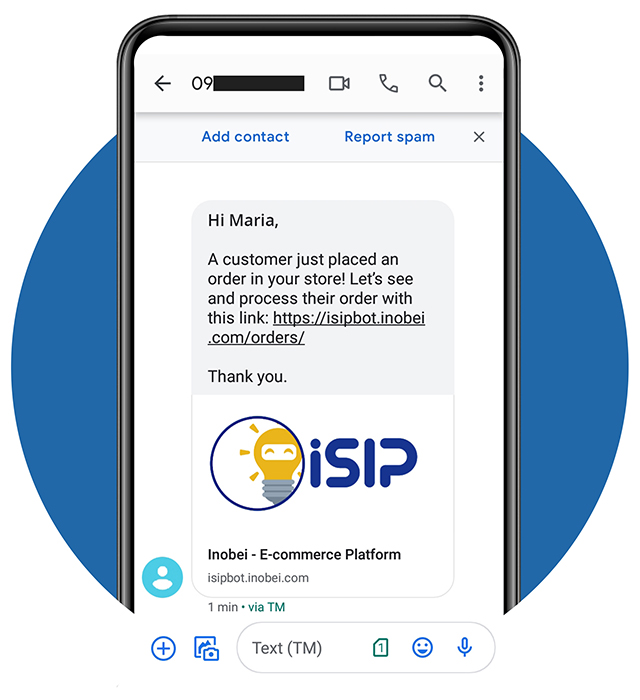
STEP 1 - Order Notification
- As a merchant, you will receive an SMS and Email notification after verifying the customer’s payment.
- For SMS Notification, you will receive a link to check and verify their payment Note: SMS notification is from Sender Name: ISIP
- Click the https://isipbot.inobei.com/orders to check and verify their payment
- This will redirect you to your ISIP sign-in page
STEP 1 - Order Notification – Via EMAIL
- You will receive an email notification from
ecommerce@inobei.com which includes order number, processing days and order details of your customer.
- You will receive an email notification from
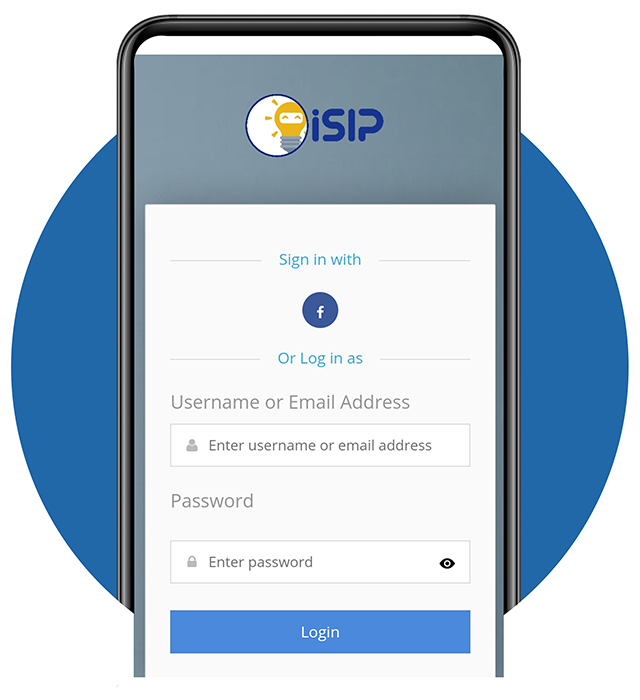
STEP 2 - Sign in Your ISIP Account
- Here is the sign-in page of ISIP
- Tap the “Facebook Logo” to automatically sign in with your ISIP Account
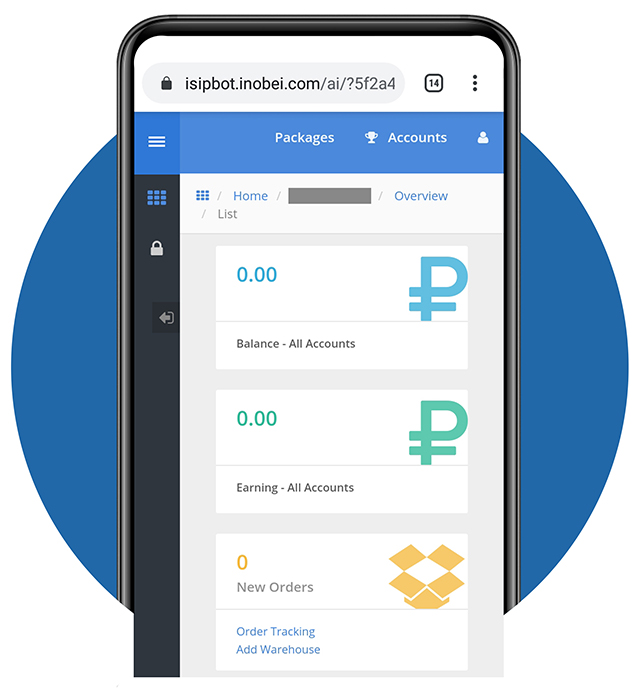
STEP 3 - ISIP Account
- You are now signed in with ISIP
- Here, you can see the details of your account
- There are 2 ways on how to go to Order Tracking:
1. Tap the Order Tracking menu
2. Tap the “3 lines-button” to view menus
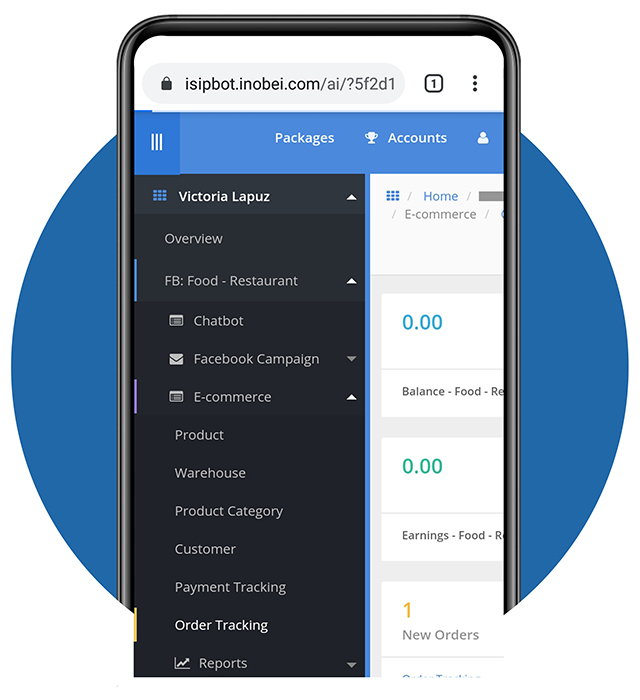
STEP 4 - Order Tracking
- When viewing the menu, a list box will appear
- Tap Order Tracking to view all orders
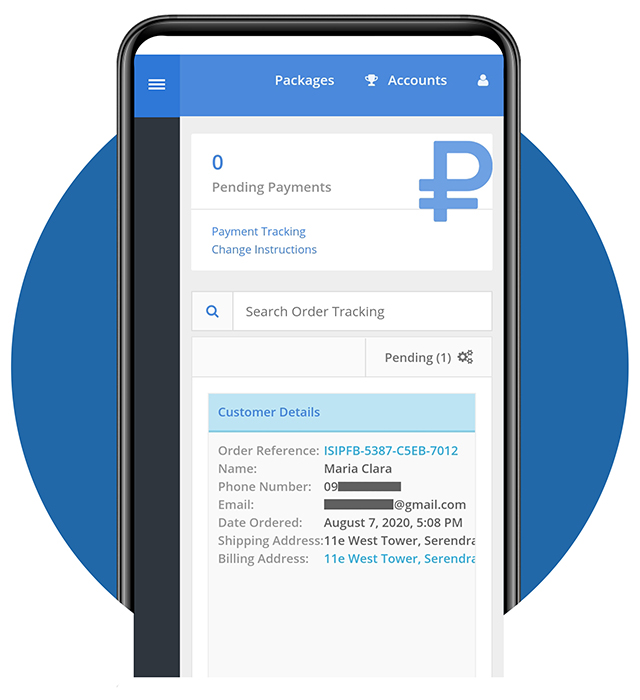
STEP 5 - Pending Orders
- Here, you can see the statuses of the order
Pending
Dispatched
Fulfilled
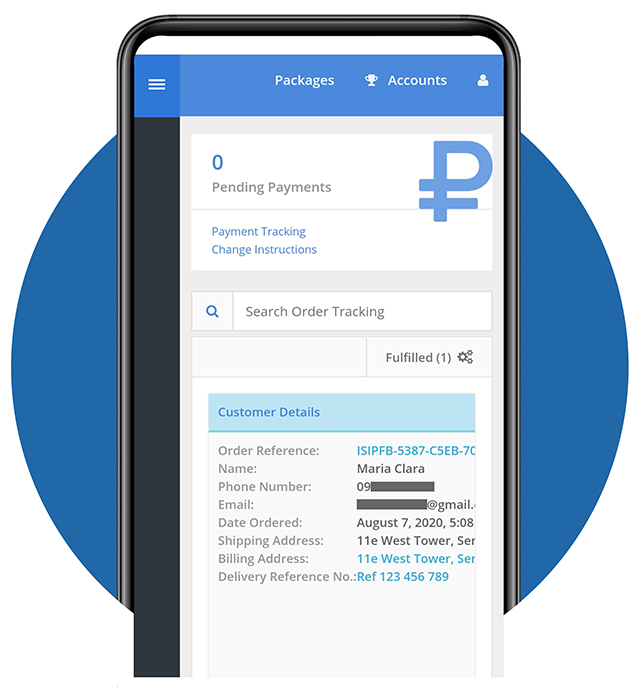
Cancelled - For Pending, we can view the Order Reference and Customer details. This is the information provided by our customer
- Swipe to the left to view more details
- Here, you can see the statuses of the order
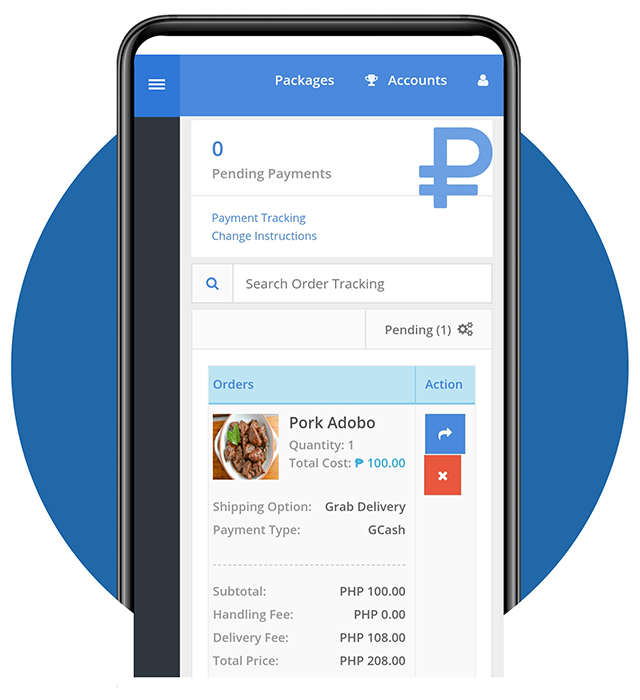
STEP 6 - Dipatching Orders – Part 1
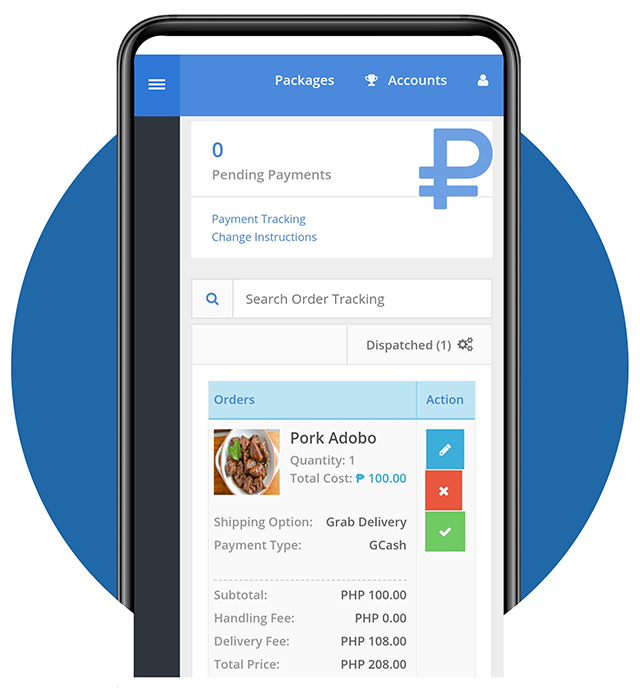
- As you swipe left, you will see the complete order list of your customer
- You have 2 options in processing an order: Dispatch or Cancel.
- In this guide, we will select dispatch to send the customer’s order
- Let’s call our courier selected by our customer to deliver their order/s.

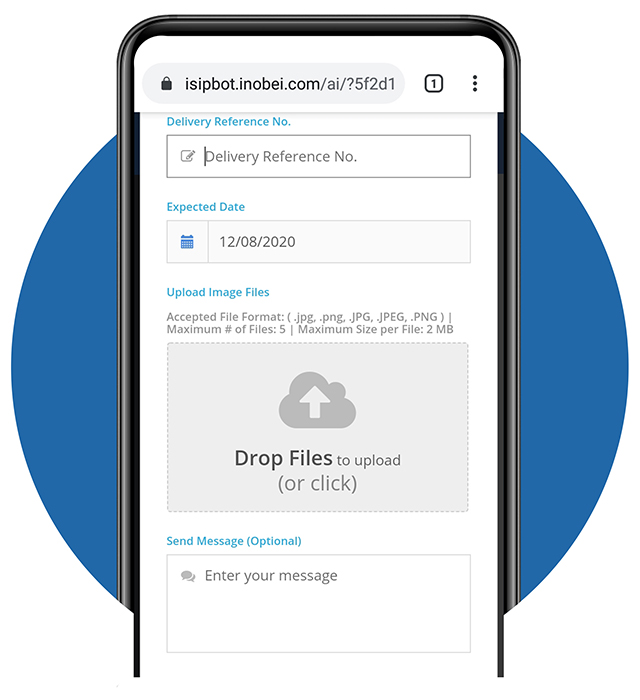
STEP 6 - Dispatching Orders – Part 2
- After contacting your courier, enter the Delivery Reference No. to confirm the delivery.
- Put the Expected Date when will the customer receive their order.
- You may upload photos here regarding your product delivery.
- Please take note on the maximum files and size per file.
- Continue to scroll down …
STEP 6 - Dispatching Orders – Part 3
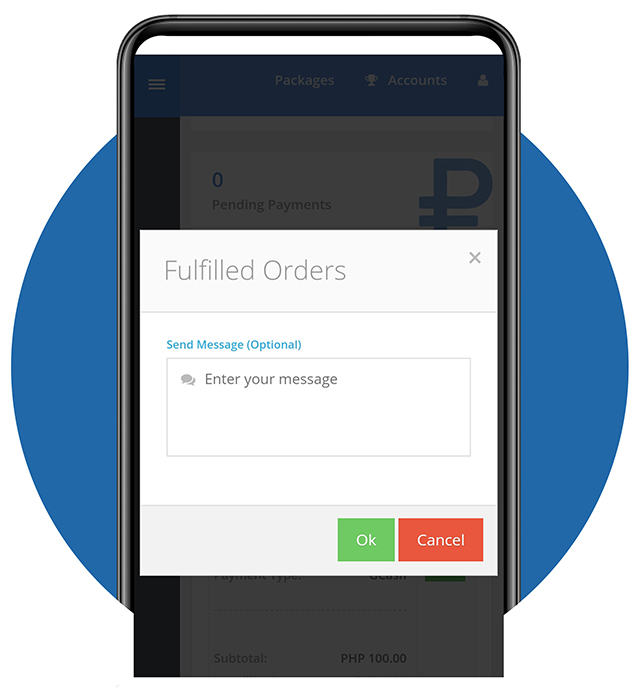
- It is optional to enter a message here
- If you’re done, tap Ok to dispatch the order.
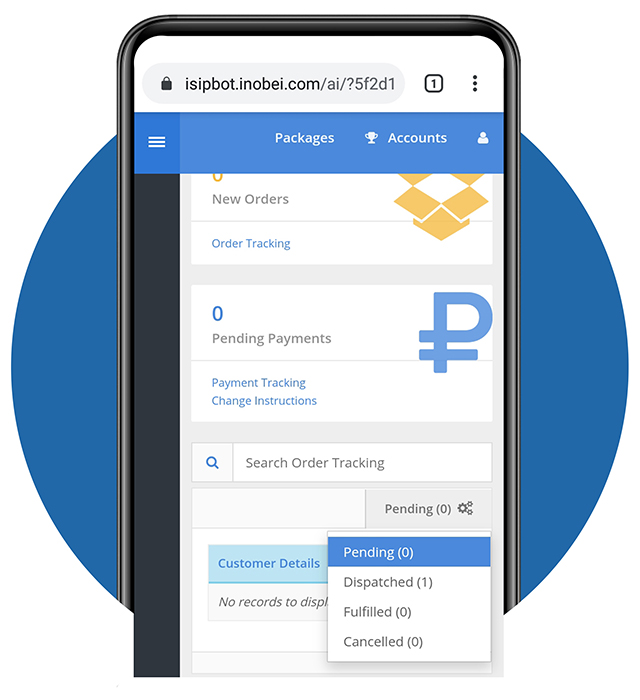
STEP 7 - Dispathced Orders - Part 1
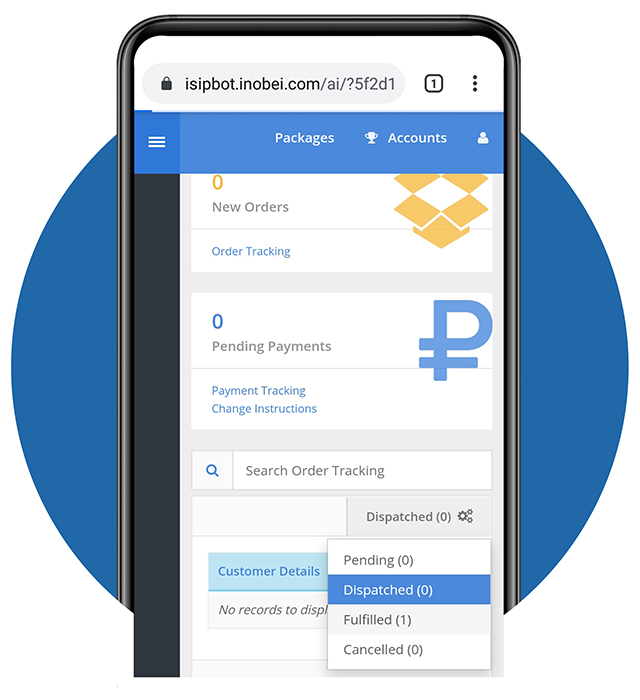
- You can see the dispatched orders in the Dispatched Tab
- Select Dispatched in the drop down menu
STEP 7 - Dispatched Orders – Part 2
- After selecting Dispatched, you will see all the orders that have been dispatched and on its way to deliver.
- Swipe to the left to see more details.
STEP 8 - Fullfilling Orders – Part 1
- Here, you may see the summary of your customer’s order, payment type and shipping option.
- If the order has been delivered to your client, let’s mark this as Fulfilled by tapping the ‘check’ mark inside the green box.
STEP 8 - Fullfilling Orders – Part 2
- A pop-up message will appear
- You may enter a short message for remarks before tapping Ok to fulfill the order
- Or you may just simply tap Ok to fulfill the order
STEP 9 - Fullfilled Orders – Part 1
- You can see the fulfilled orders in the Fulfilled Tab
- Select Fulfilled in the drop down menu

STEP 9 - Fullfilled Orders – Part 2
- After selecting Fulfilled, you will see all the orders that you have fulfilled.