We're here to provide you a Step-by-Step Guide on how will a customer pay with a PayPal:
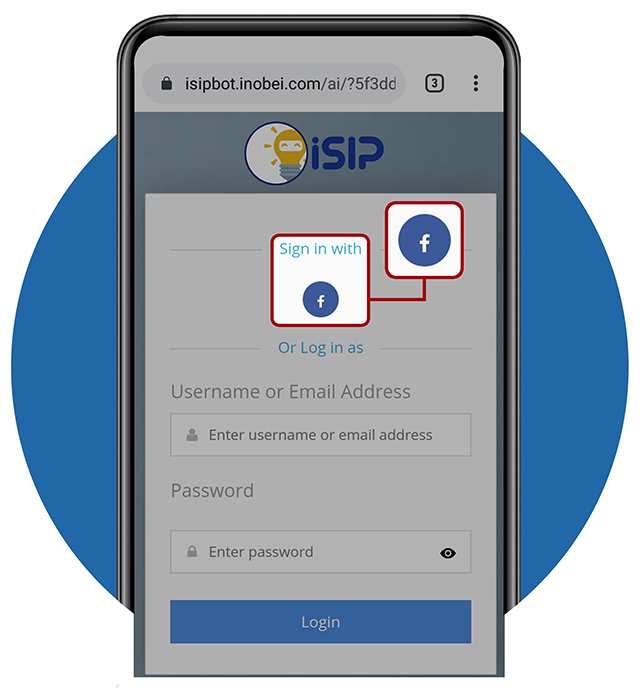
STEP 1 - Sign in Your ISIP Account
- Here is the sign-in page of ISIP
- Tap the Facebook Logo to automatically sign in with your ISIP account
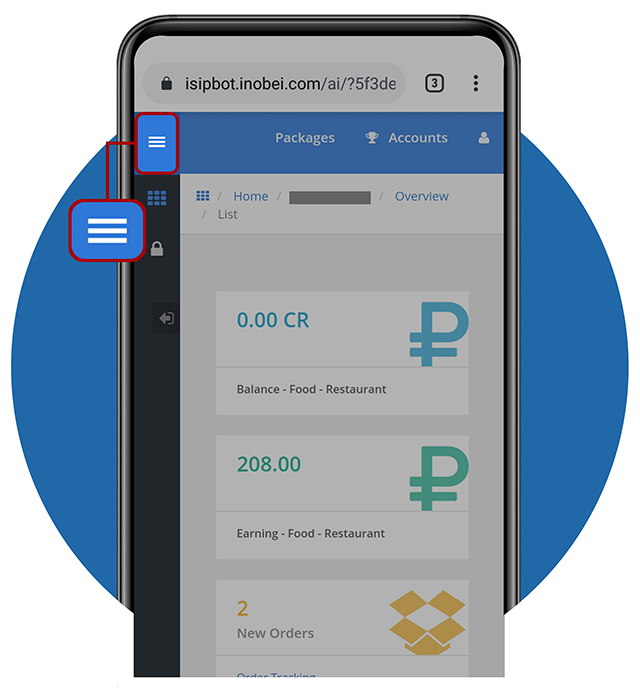
STEP 2 - ISIP Account
- You are now signed in with ISIP
- Here, you can see your account
- Tap the 3 lines-button to view menus
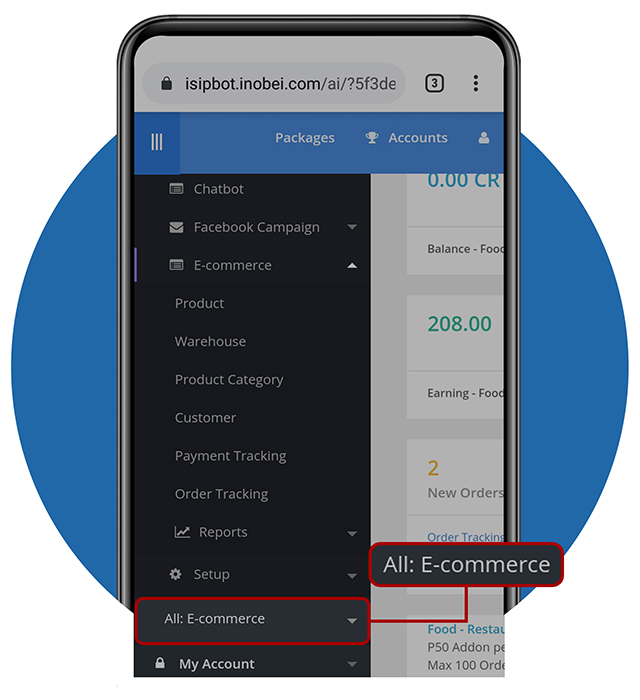
STEP 3 - Selecting All E-Commerce
- Viewing the menus, select All: E-Commerce menu
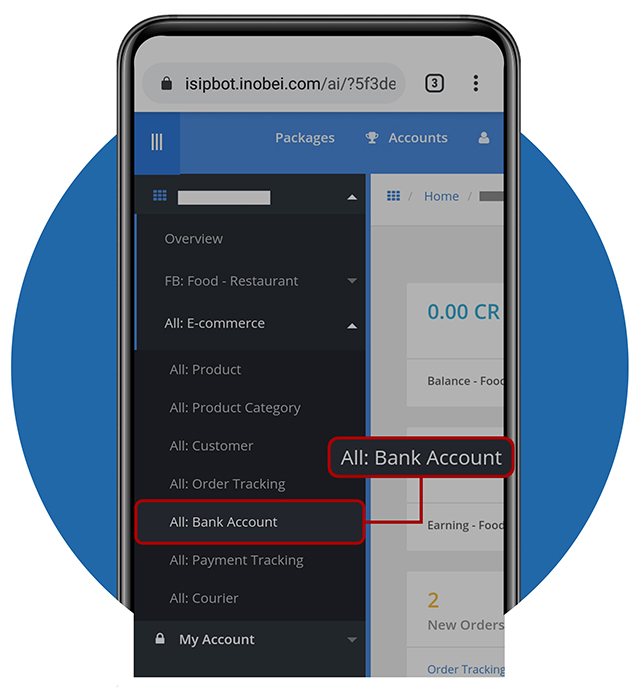
STEP 4 - Selecting All: Bank Account
- Here is the “All E-Commerce” menu, select All: Bank Account
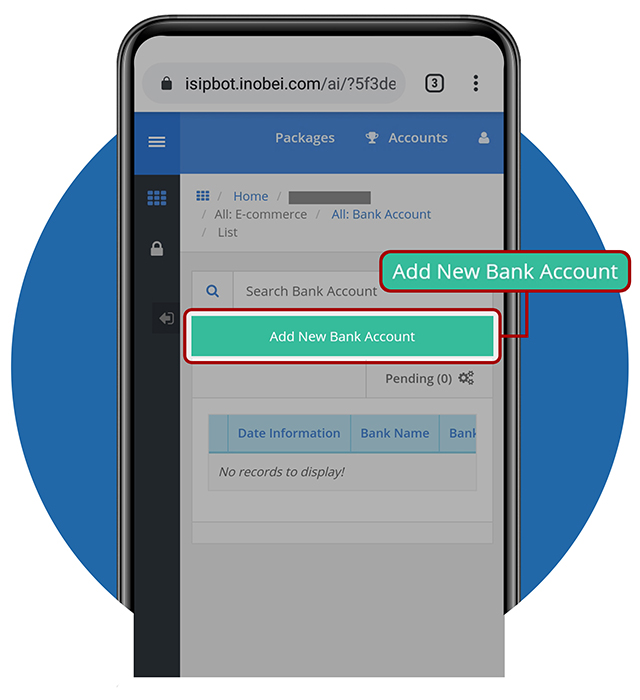
STEP 5 - Adding New Bank Account – Part 1
- All the Bank accounts details and statuses will be viewed here
- Let’s add a new Bank account by tapping the Add New Bank Account button

STEP 5 - Adding New Bank Account – Part 2
- Let’s add bank details by:
– Select a Bank Name by tapping on dropdown icon (What bank do you have)
– Enter Bank Branch (What branch did you open your account)
– Enter your Account Name
– Enter your Account Number
- When you’re done, tap Add Bank Account
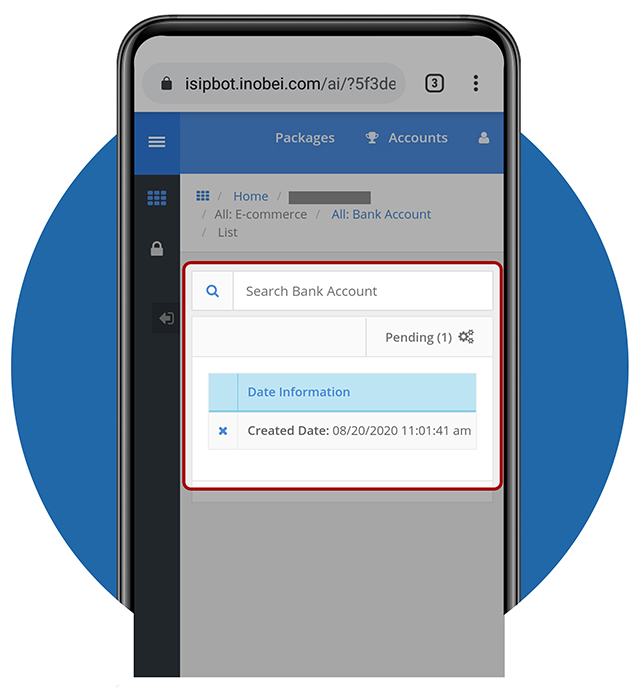
STEP 6 - Bank Account Has Been Added
- Your bank account has been added!
- It will be placed in the Pending Tab.
- ISIP will verify your account.
- You can also delete this bank details by tapping the x button on the left side.
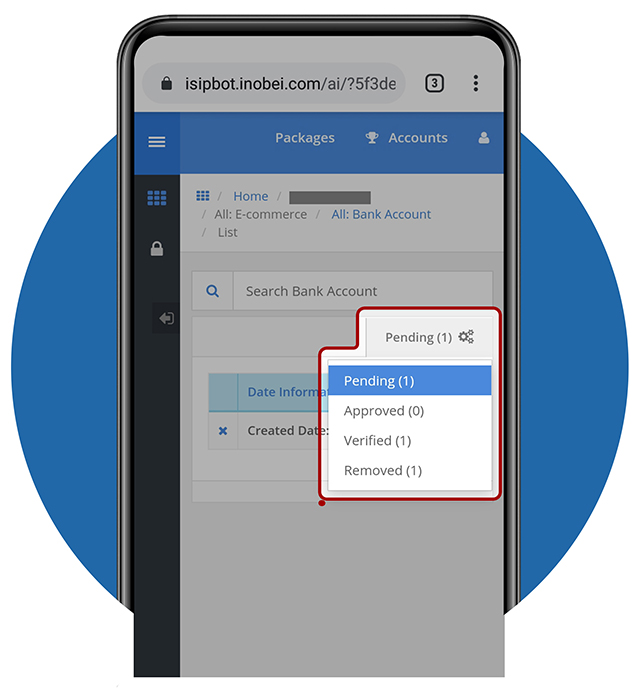
STEP 7 - Bank Account Statuses
- You can check statuses of your Bank details by tapping the options tab
- You can see which are:
– Pending
– Approved
– Verified
– Removed
- You can add more Bank accounts if you wish to. If you still need more guide, you can go back to Step 5.