Want to sell more products? Here’s a Step-by-Step Guide to Add Products in your Store:

STEP 1: Sign in Your ISIP Account
- Here is the sign-in page of ISIP
- Tap the Facebook Logo to automatically sign in with your ISIP Account.
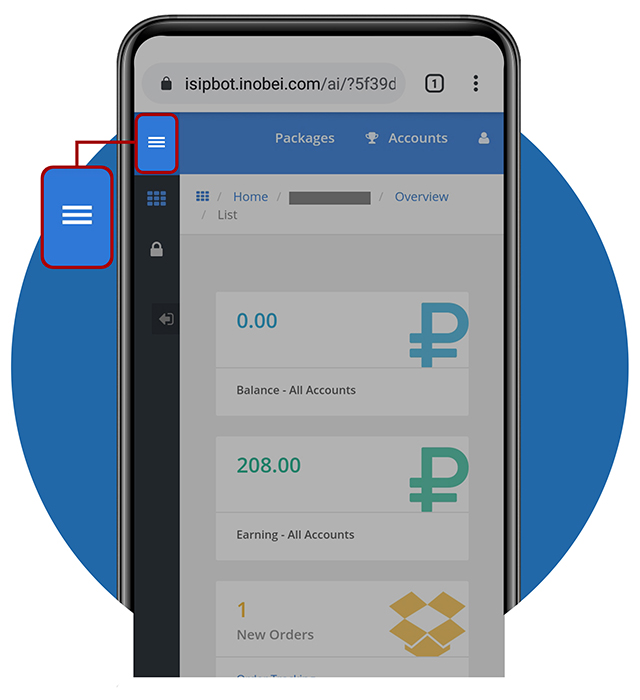
STEP 2: ISIP Account
- You are now signed in with ISIP
- Here, you can see your account
- Tap the 3 lines-button to view menus
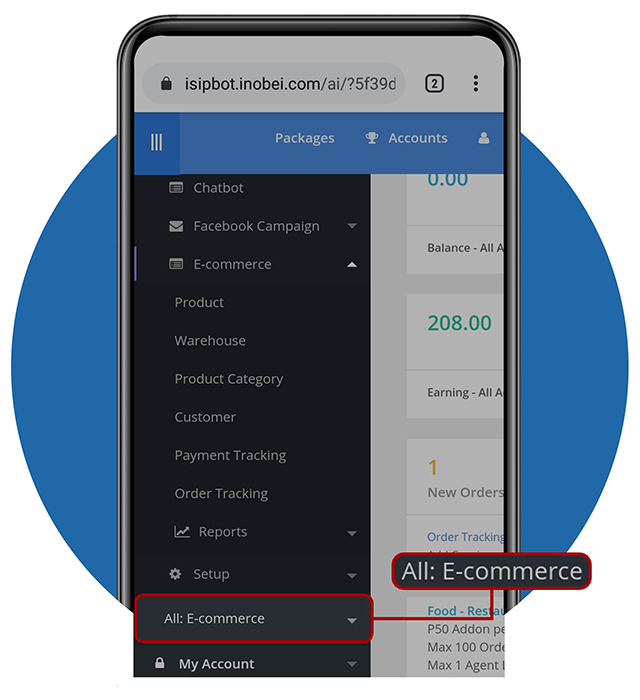
STEP 3: Selecting All E-Commerce
- When viewing the menus, select the All: E-Commerce menu
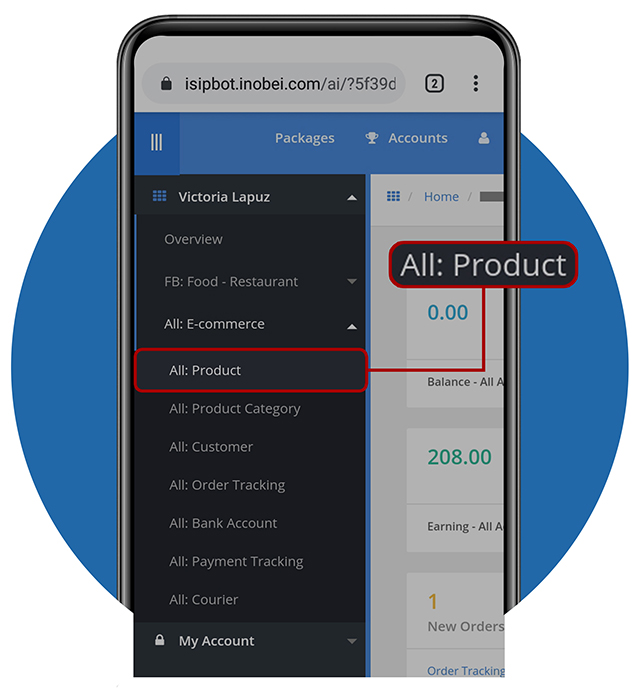
STEP 4: Selecting All: Product
- Here is the “All E-Commerce” menu, select All: Product
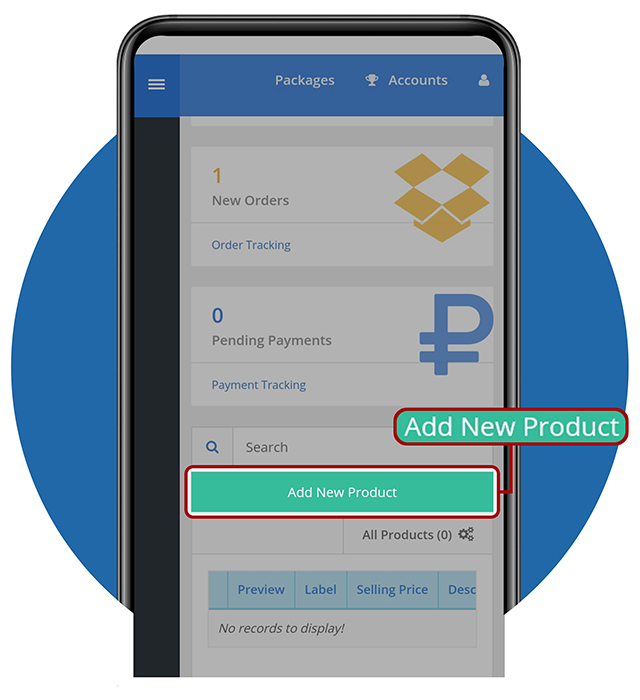
STEP 5: Adding Product – Part 1
- All the products will be viewed here
- Let’s add a product in our store by tapping Add New Product button.
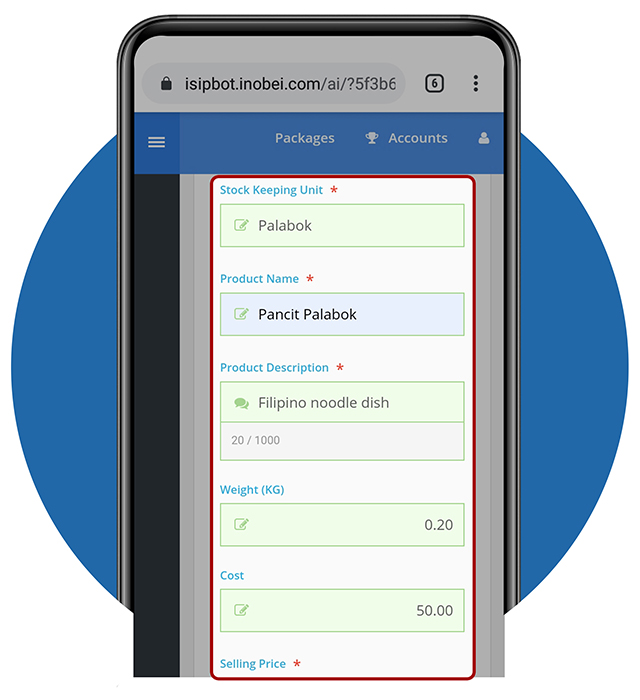
STEP 5: Adding Product – Part 2
- To add a product, enter your:
– Stock Keeping Unit
– Product Name
– Product Description
– Weight
– Cost (capital)
– Selling price
– Rank Priority
Scroll down to continue adding details to your product…
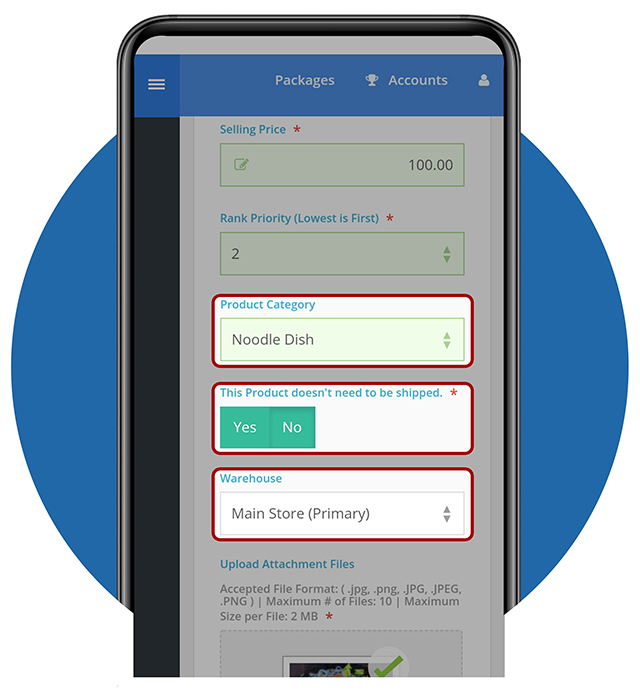
STEP 5: Adding Product – Part 3
- Select a Product Category
- Select options Yes or No if this doesn’t need to be shipped.
- Select a Warehouse if you have multiple warehouses.
Scroll down to complete the procedure…

STEP 5: Adding Product – Part 4
- Upload a photo you want to display in your store.
Note: Please take note on the maximum files and size per file.
- If you’re done adding details about your product, tap Add Product button to continue.
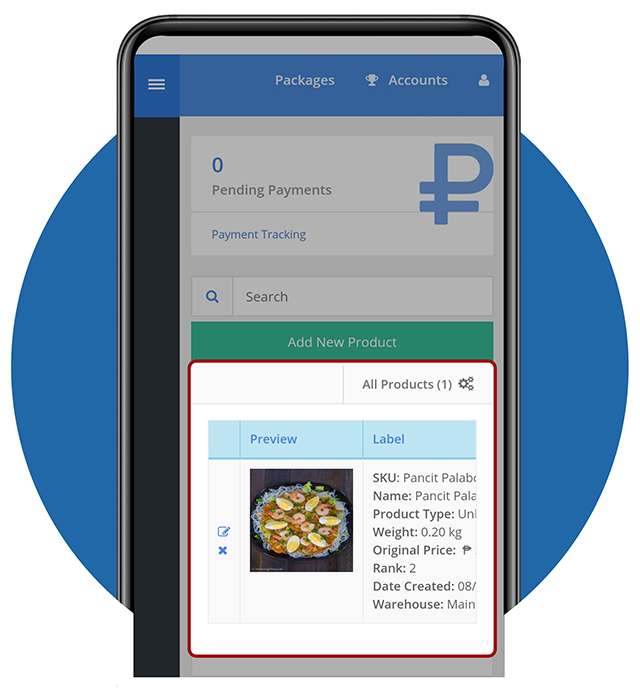
STEP 6: A New Product has been Added
- After adding a product, you will see all the products that you have been added in ‘All Products’ tab
- Swipe left to see more details
- You can edit your product by tapping the ‘edit’ button
- Have more products to sell? Let’s add them. You may go back to Step 5 if you still need a guide.
Add more products, para mas madami ang benta!