You may want to payout your earnings in ISIP. Here’s a Step-by-Step Guide on how to Payout your Earnings:
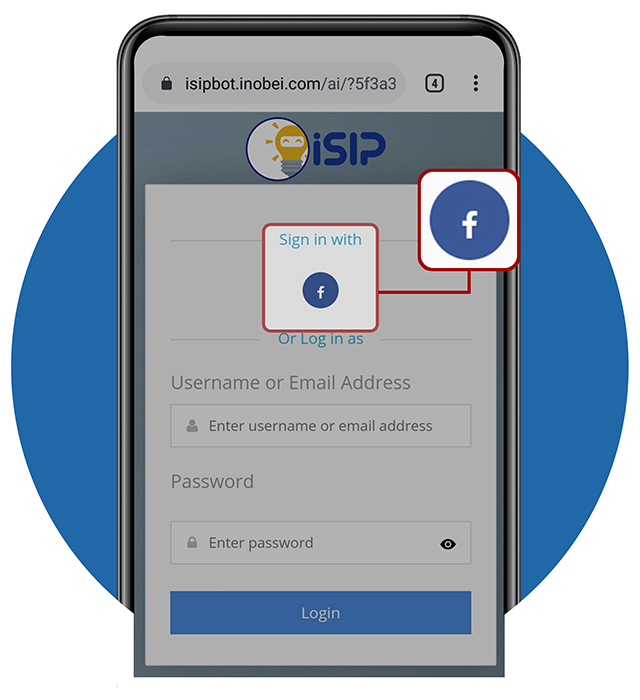
STEP 1- Sign in Your ISIP Account
- Here is the sign-in page of ISIP
- Tap the Facebook Logo to automatically sign in with your ISIP Account.
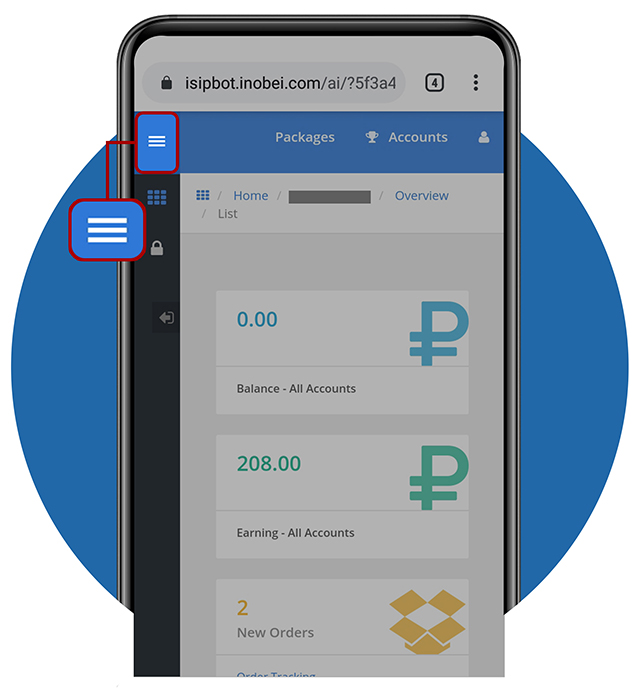
STEP 2 - ISIP Account
- You are now signed in with ISIP
- Here, you can see your account
- Tap the 3 lines-button to view menus
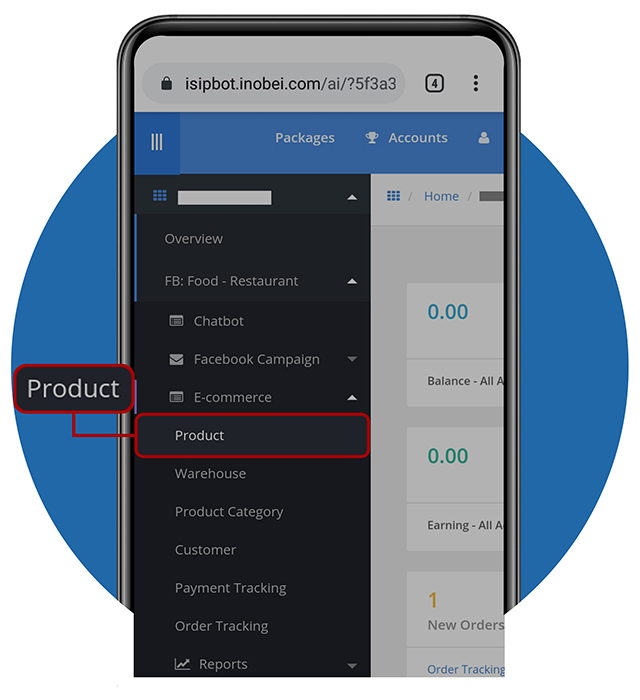
STEP 3 - Selecting Products
- A preview of menu will appear
- Tap Product to view earnings to payout
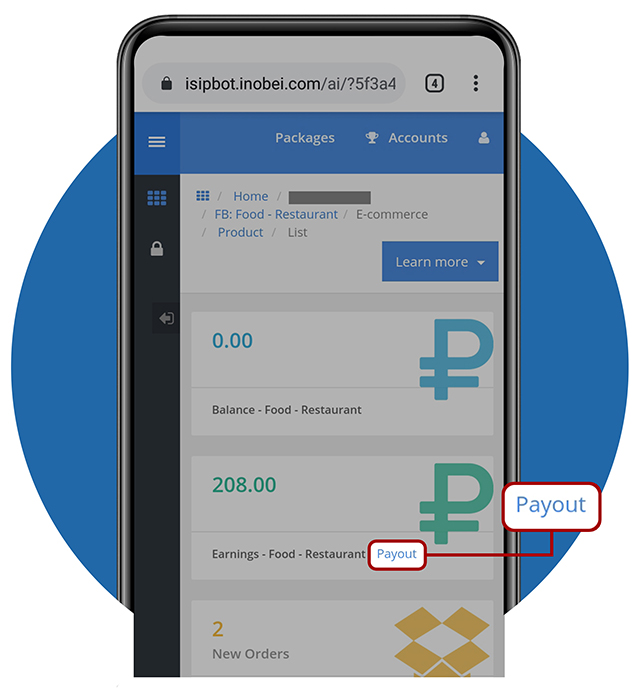
STEP 4 - Selecting Payout
- You will see your earnings here
- Tap the Payout hypertext to payout your earnings
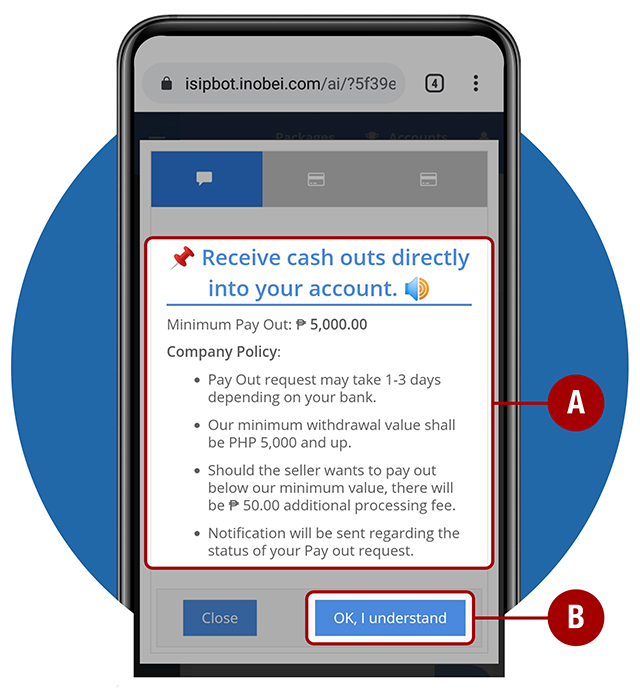
STEP 5 - Requesting Payout – Part 1
- Here, you can see the terms of ISIP for Payout
- The minimum withdrawal is Php 5, 000.00, but if you want to withdraw less than that, your Payout will be deducted Php 50.00 as a charge for processing fee.
- Tap Ok, I understand to proceed to Payout, or Close to exit.
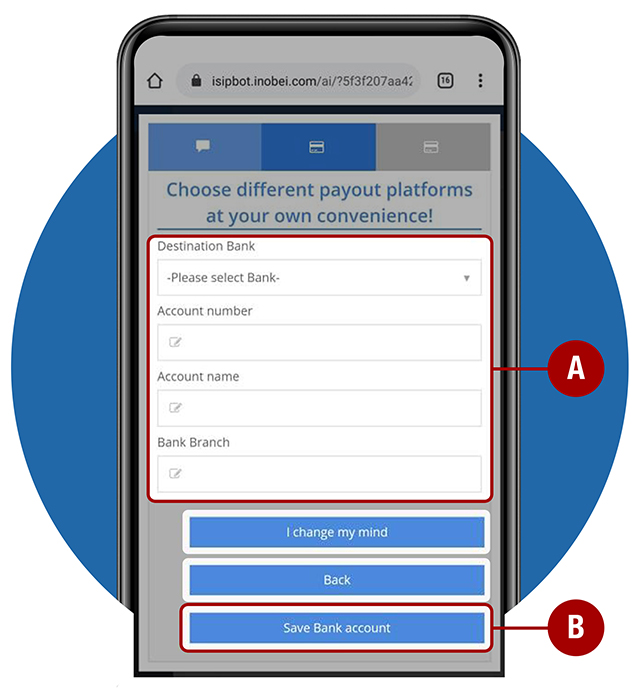
STEP 5 - Requesting Payout – Part 2
- Let’s fill out these bank details, where will you receive your earnings:
– Bank Name
– Account Number
– Account Name
– Bank Branch
- Tap Save Bank Account to proceed and a dialog box will appear
- You can also tap Back to read the terms for the Payout or tap I change my mind to exit and cancel
NOTE: This will only appear at your first Payout Request.
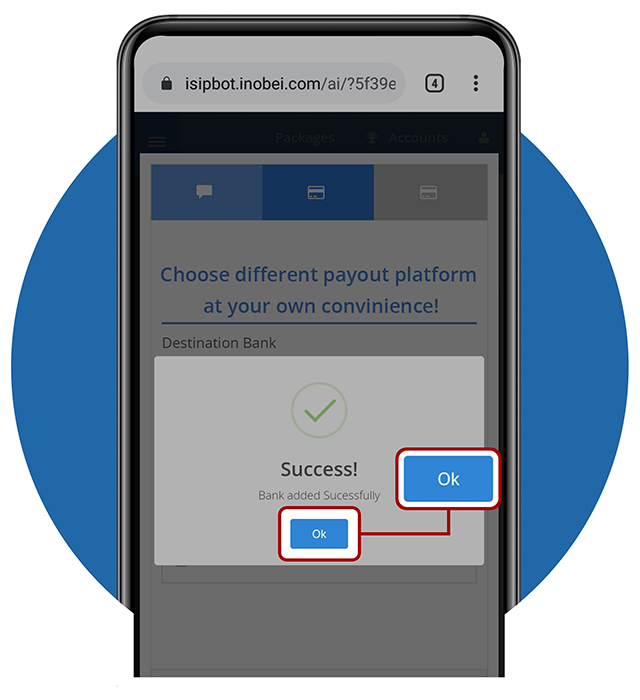
STEP 5 - Requesting Payout – Part 3
- You have just successfully added a bank information!
- You can use this bank details for filling-up the next form for Payout
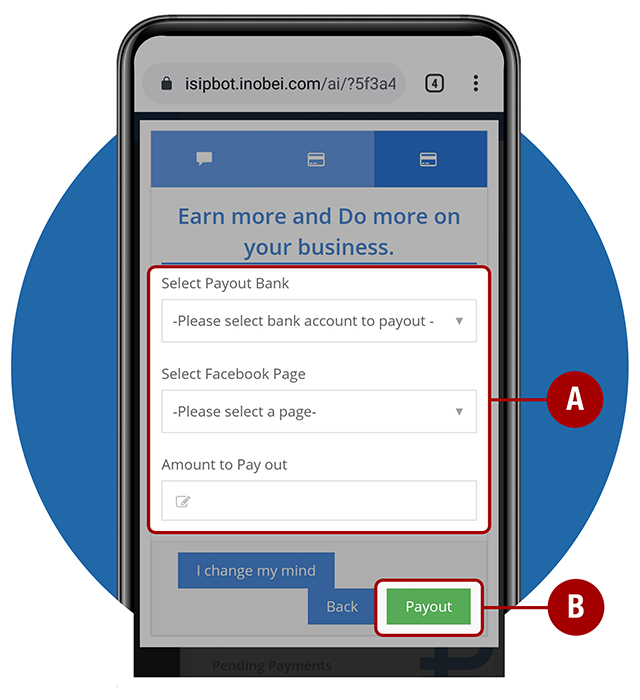
STEP 5 - Requesting Payout – Part 4
- Select a ‘Bank account’ where you can receive your earnings.
- Select the ‘Facebook Page’ where will you get your earnings.
- Enter the ‘Amount for Payout’
- Tap Payout and you’re done requesting the Payout!
- You may also select I change my mind to cancel or Back if you wish to go back on the previous step.
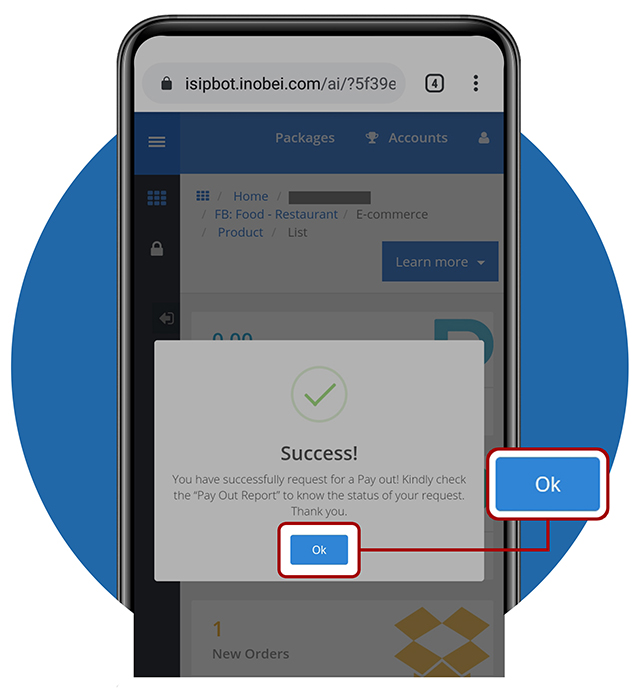
STEP 6 - Payout Has Been Requested
- You have successfully requested a Payout!
- You may see the status of the request in the Payout Report.
- Tap Ok to exit the dialog box
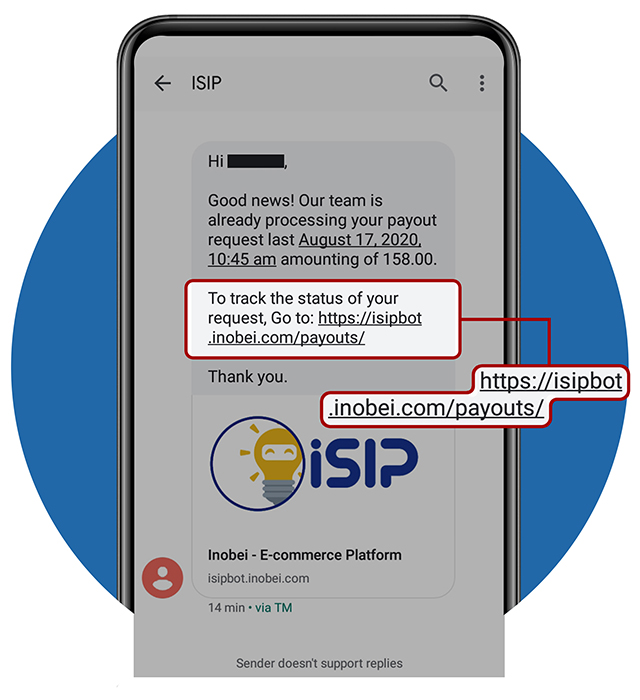
STEP 7 - Payout is for Approval - SMS Notification
- You will receive a SMS from “ISIP” about the Payout you have been requested.
- ISIP will credit your request to your bank account.
- If you want to check the status, you can sign in your ISIP account and see the status
- If you want to check the status, you can sign in your ISIP account and see the status by tapping https://isipbot.inobei.com/payout/ . If you need a guide, proceed to Step 9.
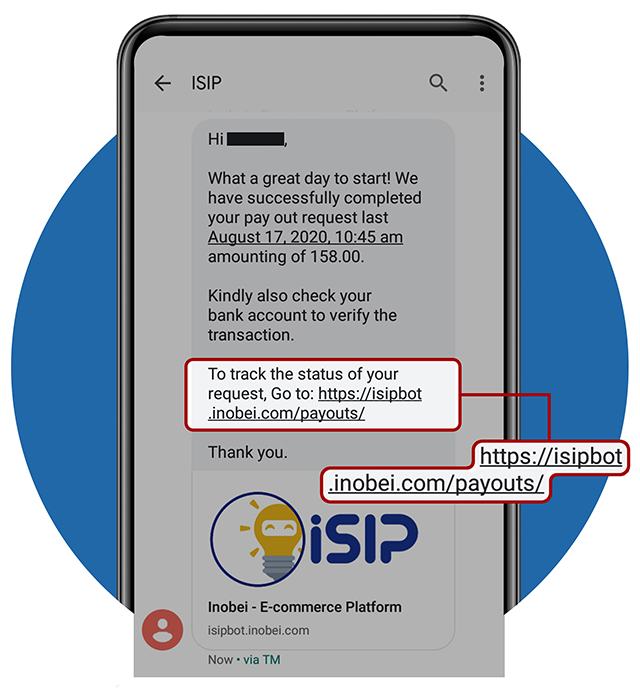
STEP 8 - Payout Request Has Been Completed – SMS Notification
- You will receive a SMS notification from “ISIP” once your request has been completed
- You may now check your bank account to verify the transaction
- You may also check the payout status on https://isipbot.inobei.com/payout . If you need a guide, proceed to Step 9.
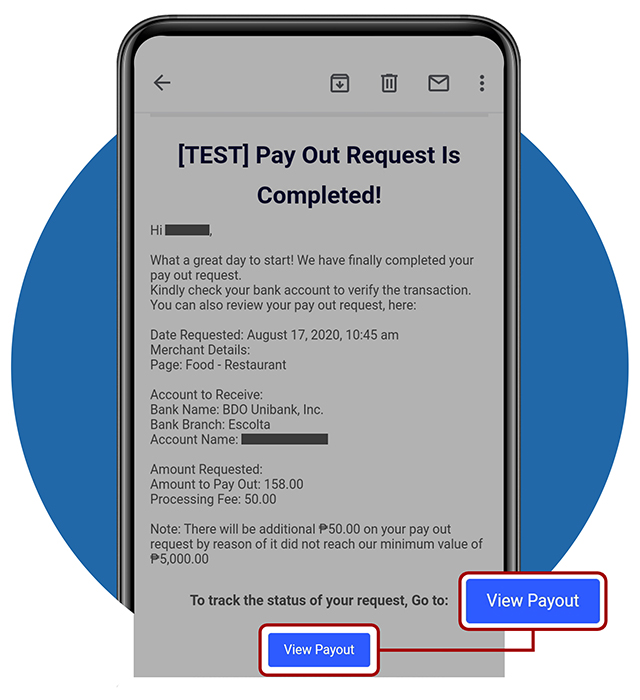
STEP 8 - Payout Request Has Been Completed – Email Notification
- You will receive an Email notification from “ecommerce@inobei.com” once your request has been completed
- You may now check your bank account to verify the transaction
- You may also check the payout status by tapping the View Payout button. If you need a guide, you can proceed to Step 9.
If you want to Check the Status of your Payout, Here is a Step-by-Step guide:
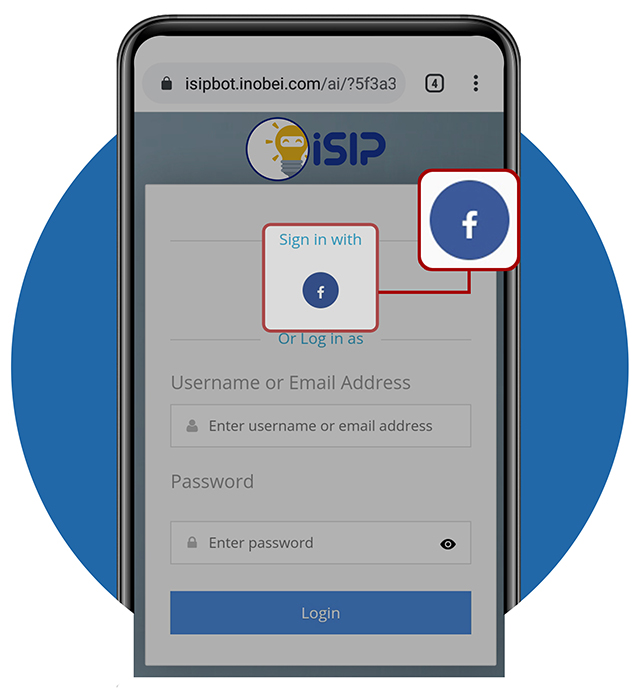
STEP 9 - Sign in Your ISIP Account
- Here is the sign-in page of ISIP
- Tap the Facebook Logo to automatically sign in with your ISIP Account.
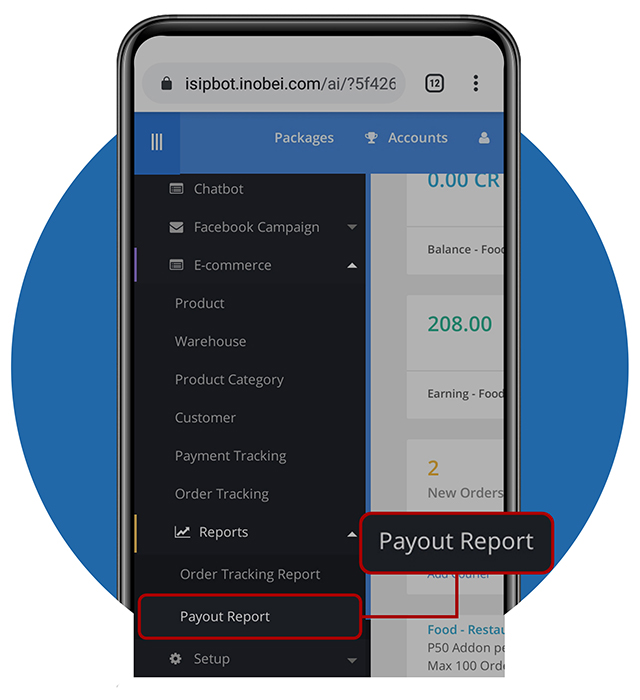
STEP 10 - Selecting Payout Report
- Tap the 3 lines-button to view menus
- When viewing the menu, tap Reports to show drop down menu
- Select Payout Report
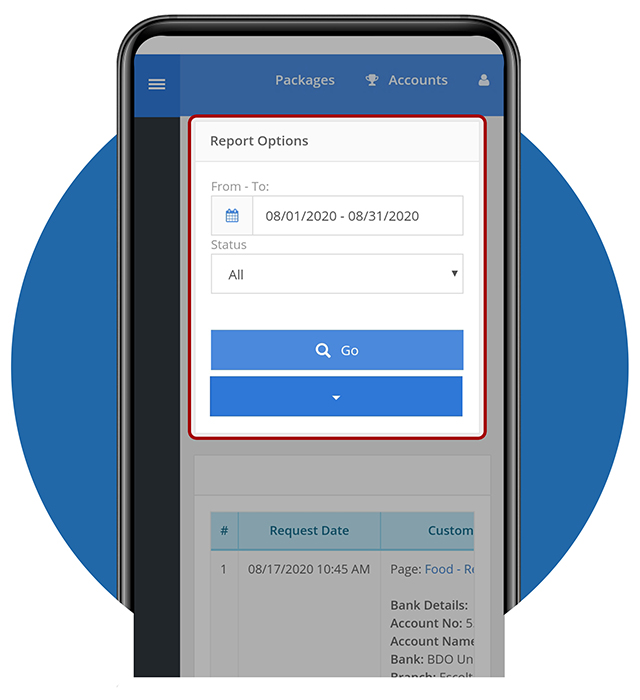
STEP 11 - Payout Report – Part 1
- Scroll down until you see the Payout Report Options
- You can search for the duration of your payout request and tap Go button to display the report
- You can select what status you want to view
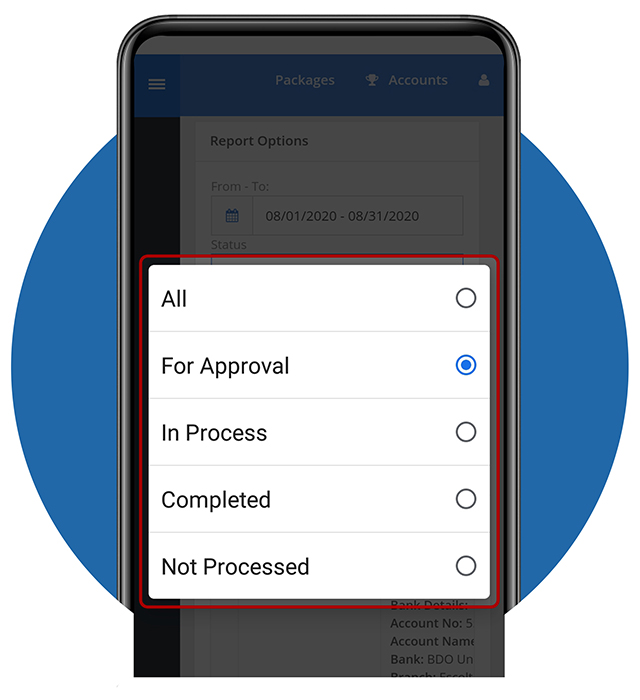
STEP 11 - Payout Report – Part 2
- For the status, you may select:
– All
– For Approval (waiting for validation)
– In Process (approved, waiting to be credited to your account)
– Completed (already deposited to your account)
– Not Processed (not approved)
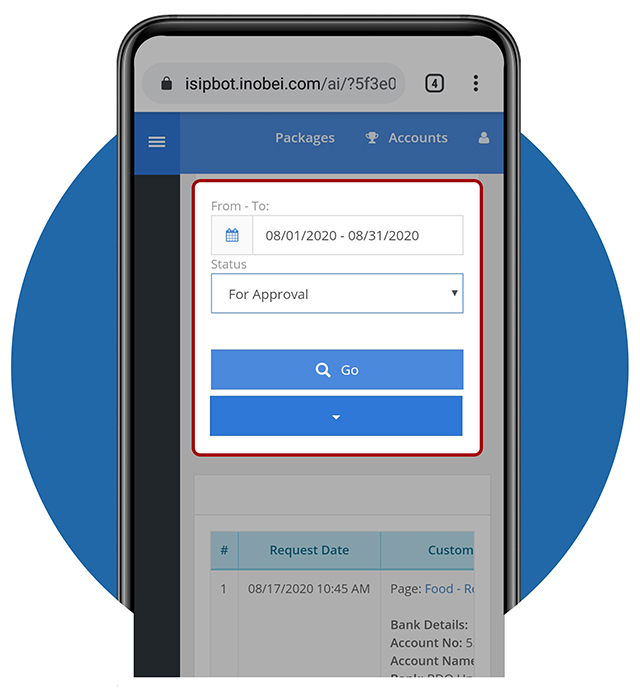
STEP 11 - Payout Report – Part 3
- Whatever status you select; it will appear here. For this guide, we selected For Approval
- You can see all the reports under For Approval here.
- Swipe to the left to see status
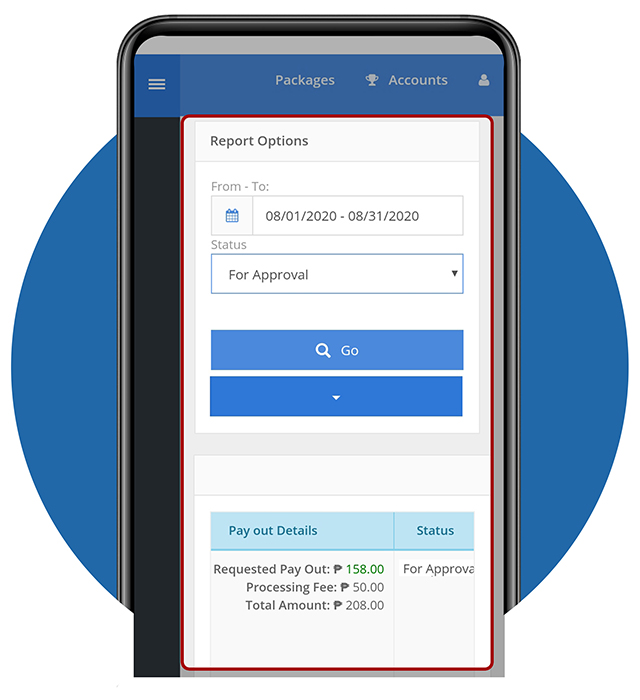
STEP 11 - Payout Report – Part 4
- Here, you can see the Payout Details and Status.
- If you want this printed, tap the drop down arrow button
- If you want to check other Payout Reports, click here for guide
